Setting up Texmaster2009
This guide will tell you how to get Texmaster2009 running. Normally, we’d tell you to check out the introductory guide, but unfortunately, we haven’t gotten around to updating the TL;DR for it juuust yet.
Also, this guide assumes that you’re using Windows as your operating system. Texmaster also works for Linux, but if you use Linux, you probably know what you’re doing. Installing mostly works the same way though, so you can still take a good chunk of info from this guide and apply it to your Linux install.
Here’s the steps we’re taking on:
- Downloading Texmaster2009-5
- Seting up Texmaster properly
- OPTIONAL: Seting up “Termino Velocity”, a custom theme
Downloading Texmaster2009-5
First thing you need is Texmaster itself, of course. The link for that can be Right about here. You’ll need 7-Zip to unpack the archive. If you don’t have it yet, use your mighty Google powers and find any mirror to download it from. (TODO link 7-Zip website) Just unzip it anywhere and you will end up with a folder named Texmaster2009. Enter that folder - You should see something like this.
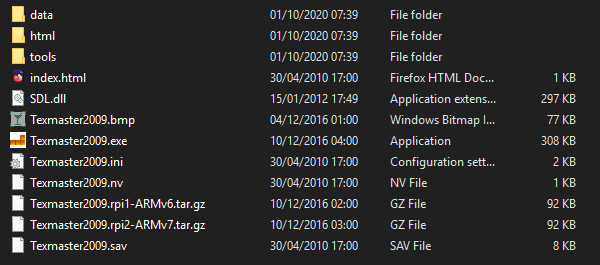
From here on out, this place will be referred to as the root folder in the guide.
Technically, Texmaster is already ready to go, albeit with a bit of a cramped layout.
Assuming you have a QWERTY keyboard:
P1 Up          - S
P1 Down        - X
P1 Left        - Z
P1 Right       - C
P1 Button 1    - N
P1 Button 2    - M
P1 Button 3    - ,
P1 Button 4    - Spacebar
Setting up Texmaster properly
However, of course, we can remedy this, thanks to the wonderful Texmaster2009.ini file we can see in the root folder. Open it up in a text editor of your choice - if you don’t have one yet, we recommend you to give Notepad++ a try!
Now, once in here, there’s a bunch of variables you can change. In the [VIDEO] settings, I recommend you to only change the resolution and whether you want to use fullscreen or not. The other options are a bit more advanced and don’t really matter anyways.
The part that’s more important to us is the [KEYBOARD] settings, which you can find when scrolling down a bit. This only applies if you do not want to use the base key layout. Go ahead and change the player1 variable into a 5. This will allow us to set the correct keys by reading from the other variables labled key_type5 right below that.
Now, unfortunately, unlike the example in the .ini file tells you to do, you can’t just put the actual keys you want to use in there and have it work. What you need to do is enter specific numbers which correspond to a certain key. As for which number you have to type in for the individual keys, you will have to go into your html folder which you can find when you have the root folder open. From there, open key.html, and there you will have a handy list of which numbers correspond to which keys. Use the search function by pressing CTRL+F, type in a key, and you should be able to find the corresponding number quite quickly. Now it’s just a matter of putting those numbers into the specific variables. Here is how the guide maintainer has his set up, for example:
key_type5_up = 119
key_type5_down = 115
key_type5_left = 97
key_type5_right = 100
key_type5_a = 106
key_type5_b = 107
key_type5_c = 108
key_type5_d = 32
This will result in a layout that uses A and D to go left/right, W for a sonic drop, S for a hard drop, JKL for rotations and the space bar for hold. Basically, it shifts the default layout up by one key row.
Either way, once this is all done, you can save your .ini file, as we are pretty much done here. Now is the time where we head into the actual game itself to do things!
When you’re first opening the game, you’re greeted with a nice splash screen and a logo. Press your first rotation key (M in the default key layout) to go into the profile selection menu, and create a new profile. Scroll through the letters with your navigation keys and set your name for the profile. After that, select your profile.
Now you’re greeted with whether you want to play in Classic or World mode. Classic is how the TGM games have usually worked, with a rotation system normally known as Arika Rotation System, or ARS for short, where as World mode is used by current-gen Tetris games such as Puyo Puyo Tetris or Tetris Effect, known as Super Rotation System or SRS. However, the implementation for World mode isn’t the best… a lot of things don’t work. We’d highly recommend playing in Classic mode anyways, as it’s more true to the TGM feel.
From here, now you can select any of the modes. Here’s what each mode corresponds to from the real games:
NOVICE     = Normal mode from TGM2
NORMAL     = TGM1
ADVANCE    = TGM+ mode from TAP
SPECIAL    = Master mode from TGM2
SUDDEN     = T.A. Death mode from TAP
DOUBLES    = Doubles mode from TGM2
SPECIAL Ti = Master mode from Ti
SUDDEN Ti  = Shirase mode from Ti
Also, the function keys (F1 - F12) All do different things. Here’s what they each do:
F1  - Fast Forward
F2  - Speeds up menus, for some reason...
F3  - Check best section times
F4  - No function
F5  - Screenshot
F6  - Replay viewer
F7  - Sound test
F8  - Change playfield view (Recommended for custom themes!)
F9  - No function
F10 - Show FPS, speed and CPU usage
F11 - Instantly stop game and go back to title screen
F12 - Stop playing current BGM
And with that, you’re pretty much set to go, unless you want to install a custom theme, in which case, read on:
Seting up “Termino Velocity”, a custom theme
Yep, this game has custom themes. This one, Termino Velocity, is praised by many players to be among the best Texmaster themes ever created. Unfortunately, Digital, the creator of the theme, has been inactive for a long time and the theme ended up being ported painstakingly to the newest Texmaster version by sinefuse.
So, if you want to install Termino Velocity, which looks like this:
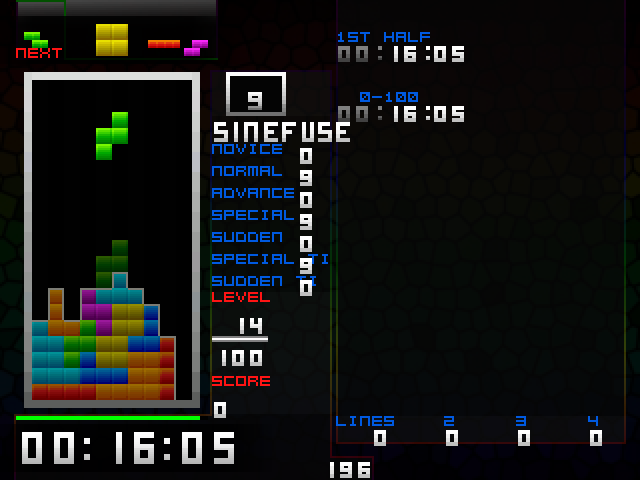
Then you’re in the right place. It’s quite easy, too: Download this archive. Open it and you will find a data folder. Replace the current data folder inside your root folder of your Texmaster install with the one inside the archive.
Now, you need to go into the Texmaster2009.ini again, and search for a variable named bg_brightness. Replace the 6 with a 0. Save the file and fire up the game - if you did it correctly, your game should now look like the preview further up. All you need to do now is press F8 to properly align the playfield and you’re done!
Now go out there and play some Tetris! Feel free to share this guide if it helped you!