Setting up an emulator to play TGM and TAP
Welcome! This guide will teach you how to set up an emulator to play TGM and TAP. For a TL;DR, it’s recommend for you to check out the Introductory guide, available over the sidebar.
Here’s what we will do:
- Download Shmupmametgm, the emulator of choice for easy setup
- Install and set up Shmupmametgm properly
- Configure inputs
- Enable Free Play so we don’t have to feed our game “coins”
With that out of the way, let us get started.
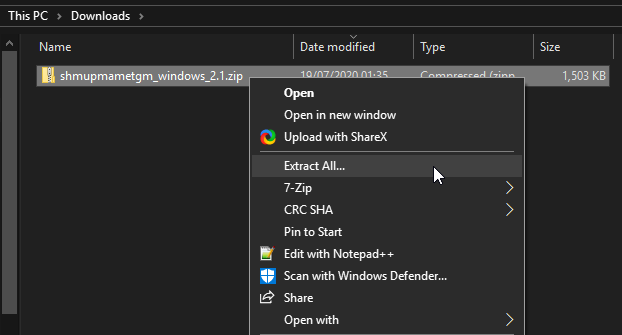
First off, you will have to download Shmupmametgm, the download link for that is right here. Once you have it downloaded, head over to the folder where you downloaded it to. We will now unzip the archive, and for convenience’s sake, we will unzip it to C:\MAMETGM\ (You can unzip this wherever you like, of course. We will just use this directory for simplicity’s sake). To do this, right click the archive named shmupmametgm_windows_2.1.zip and click on “Extract all” as shown in the image.
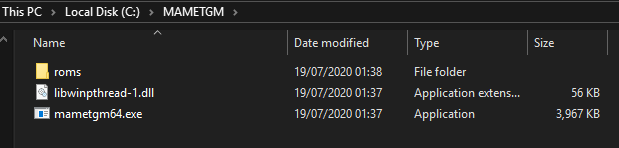
From here, paste in C:\MAMETGM\ into the textbox you see in the window that came up, check “Show extracted files when complete” and click on “Extract”. After this, the folder with the emulator itself should be there, almost ready to go. One thing you will have to do is create a roms folder in the directory that just opened. In here, you put all of your legally obtained ROM images, which should still be inside their .zip files. You zip them after all to make sure that MAME can read them. Your folder should look a bit like this now:
We’re almost done at this point. There’s additional steps you can take to make the games look better! What you want to do is hold your SHIFT key, right click in an empty space in your explorer window, and go on “Open PowerShell window here”. Paste the following command:
.\mametgm64.exe -cc
What this does is create a file called mame.ini. This file has plethora of options you can change to make your game look as crispy as possible, as without the changes we are about to do, it’ll look like a big ‘ol blurry mess. We don’t like blurry messes, so let’s go ahead and open mame.ini.
What you need to do now, once notepad has opened, is hold your CONTROL key and press F (for once, not to pay respects). A “search” dialog will open up. You want to type in filter, and it should look like this:

You should find a setting that says filter 1. We change the 1 to a 0, which disables the blurring of the individual pixels in-game (menus will still look blurry), keeping them sharp and crispy - not to mention, it also gets closer to looking like the real thing.
If you want to play windowed, you need to change 2 more settings inside the mame.ini file, which are window and resolution. You search for them like you searched for filter earlier (press CONTROL + F), you might have to change the search direction however to make sure Notepad can find what we are looking for. You want to change window to 1 and resolution to a multiple of 320x240, as that is the resolution the games run. For your convenience, here is a list of perfectly scaled resolutions:
- 320x240
- 640x480
- 960x720 - Recommended for monitors with 1366x768 as resolution, mainly older laptops.
- 1280x960 - Recommended for 1080p monitors, but you can try a lower resolution first.
- 1600x1200 - Works for 1440p monitors, but you might be more comfortable with a lower resolution.
We’re finally ready to fire up the emulator! Launch mametgm64.exe and you’ll be greeted with a selection of games. You can choose with the ARROW KEYS and the ENTER key. There’s only 2 games that you should launch from here, which are “TGM” and “TGM2P”, the latter of which is also known as “TAP”.
Once you start a game, a window will pop up - just type “OK” on your keyboard and the game will boot. From here, you need to press your TAB key to open up a configuration menu. From here, using the ARROW KEYS and ENTER, you can enter the Input (General) and Input (this Game) submenus and change your inputs how you’d like them, by going to whatever button you want to change, pressing ENTER once and then the key you’d like to use for that button. Once you’re done with setting them up in a specific way, you can press ESCAPE to exit out of the submenu and go into the other, or close the menu altogether. Do make sure to unbind (or re-bind) the Player 2 buttons to avoid input conflicts. To unbind a button, press enter to have it wait for what key you want to assign to the button, and press ESCAPE. Also, in case you are interested, here’s how the guide’s main maintainer, sinefuse, has their inputs set up:
1 Player Start - Kbd 1
P1 Up          - W
P1 Down        - S
P1 Left        - A
P1 Right       - D
P1 Button 1    - J
P1 Button 2    - K
P1 Button 3    - L
All P2 buttons - Unbinded
Whether you want to have your inputs that way is your own decision, of course, but the layout sinefuse uses is somewhat like an arcade setup, with movement inputs on the left and rotation inputs on the right.
Now, this one is kind of important to avoid tedium: you will also see a Service Menu key, which should be mapped to F2. Keep it that way. It’s an important key, and once you’ve exited out of the menu we opened to change our controls, that’s precisely the key we will press to open up the Test Menu. We want to enable Free Play in the games so we don’t have to always “throw in coins” into the emulator to play a round.
In TGM, you want to go down to 7. CONFIGURATION, enter it, enter the 1. SYSTEM setting and then change the 1. COIN setting to FREE PLAY. It should look like this:

Once you did that, you can navigate to 5. EXIT and then 4. SAVE & EXIT. It will save the settings, and then you can navigate to 9. EXIT and start playing the game by pressing the 1 Player Start key a few times!
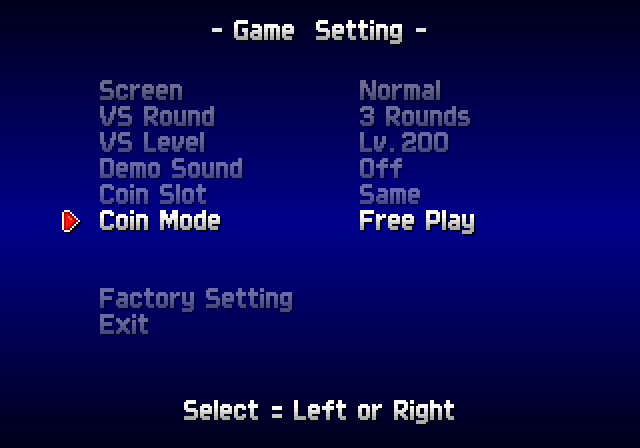
For TAP, you want to go to Game Setting enter that, then down to Coin Mode and press left once to switch to Free Play. It should look like this:
Navigate to Exit and then to Exit (Reset). Now you can start playing by just pressing your 1 Player Start key a bunch!
And with that, your emulator is properly set up and ready to go. Enjoy playing TGM!